Click here to read the English version
Il concetto è lo stesso delle opere d’arte, quei bellissimi quadri che solo a guardarli vieni catapultato dentro all’opera stessa…quest’effetto si può ottenere anche con un dolce. Ormai ne sono assolutamente certa.
Non parlo del momento in cui affondi il cucchiaino e lo porti alla bocca concentrandoti sulle sensazioni che l’assaggio ti sta trasmettendo, ma di quando, fermo davanti ad un dessert, lo guardi con timore riverenziale, affascinato dalla perfezione dei suoi dettagli…un pò come può accadere dinanzi ad un Plaisir Sucré o ad un Emoton Ispahan di Pierre Hermé, giusto per citarne qualcuno.
Creare un’illusione con un dessert non credo sia così difficile: ci vuole sicuramente un pò di manualità, ma soprattutto la conoscenza delle tecniche.Con questo non ho voluto sicuramente dire che il dolce che oggi vedete fotografato possa essere annoverato tra le magnificenze di cui sopra 😀 assolutamente NO!
Parlo invece di poter creare un dolce dal niente, applicando solamente alcune tecniche particolari e per niente difficili!
Parliamo proprio dei dettagli, in sostanza.La sfida dei Daring Bakers di questo mese riguarda l’applicazione dell’imprimer, cioè della stampa, sul biscuit Joconde, chiamato così dopo l’arrivo della Monna Lisa (la Gioconda) in Francia, bellissimo argomento scelto da Asteroshe.
La tecnica del biscuit Joconde imprimé è molto utile per personalizzare il biscuit di base con qualsiasi decorazione abbiate in mente, quindi dalle semplici righe o arabeschi a veri e propri disegni con diversi colori…molto dipende da quello che si ha in testa o dall’effetto finale che si vorrà ottenere, ma vi posso assicurare che anche la più piccola decorazione impressa, farà il suo effetto.
Il Joconde Imprimé è una decorazione “disegnata”, cotta dentro un pan di spagna leggero, in modo da dare al dolce una finitura elegante.
Il Biscuit Joconde è un leggero biscuit alle mandole e viene utilizzato per lo scopo di cui sopra perché rimane umido, mantenendo la sua flessibilità e quindi può adattarsi facilmente ai vari stampi o cerchi da pasticceria.
In effetti, qui sembra tutto quello che non è…un pò come nel Paese delle meraviglie di Alice…
Sembra difficile, ma è tutto molto semplice: il biscuit in versione stampata è semplicissimo da creare, basta seguire i passaggi indicati, mentre per quanto riguarda il mio dessert, posso dirvi che è davvero un gioco da ragazzi!
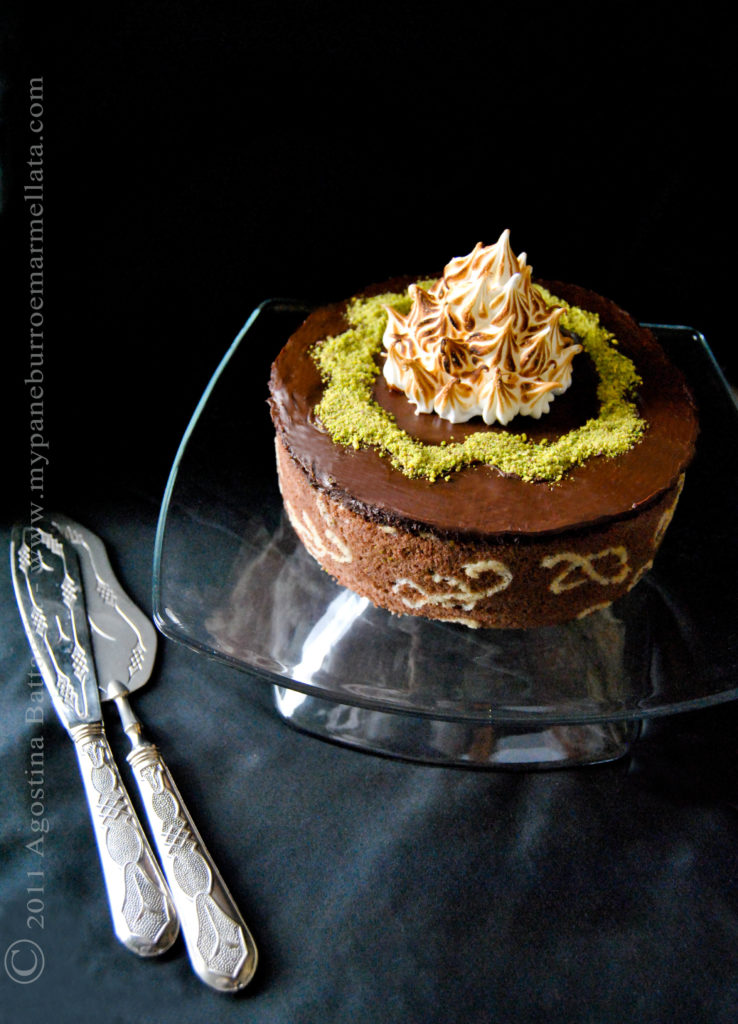
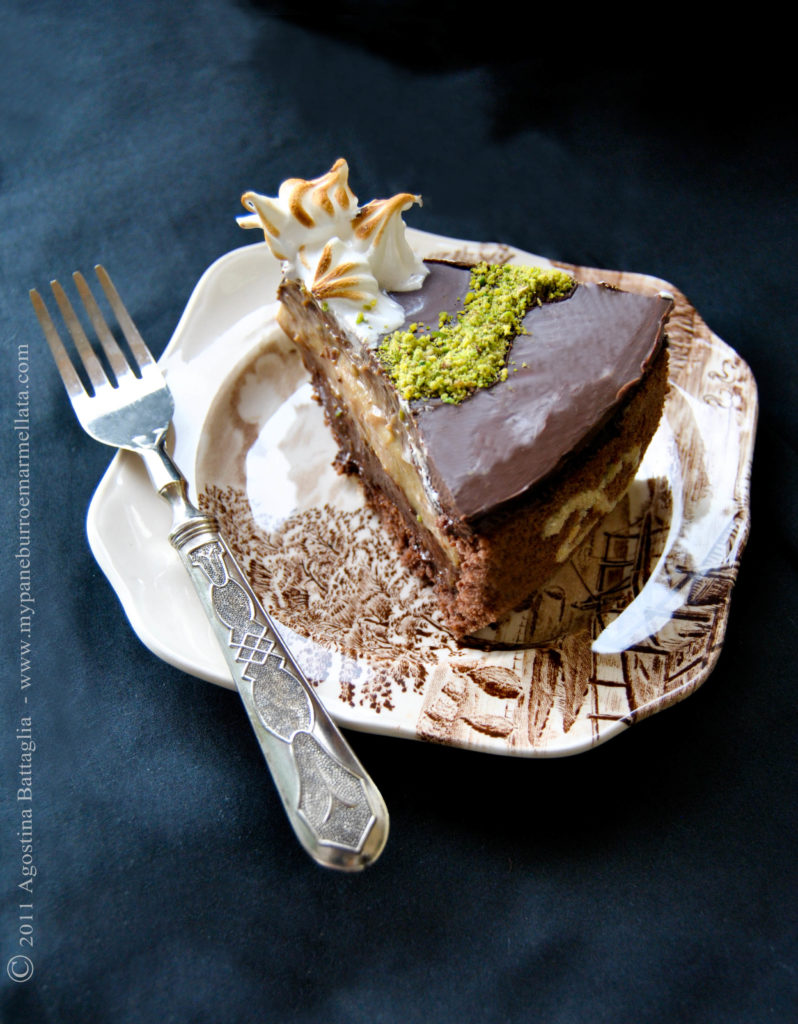
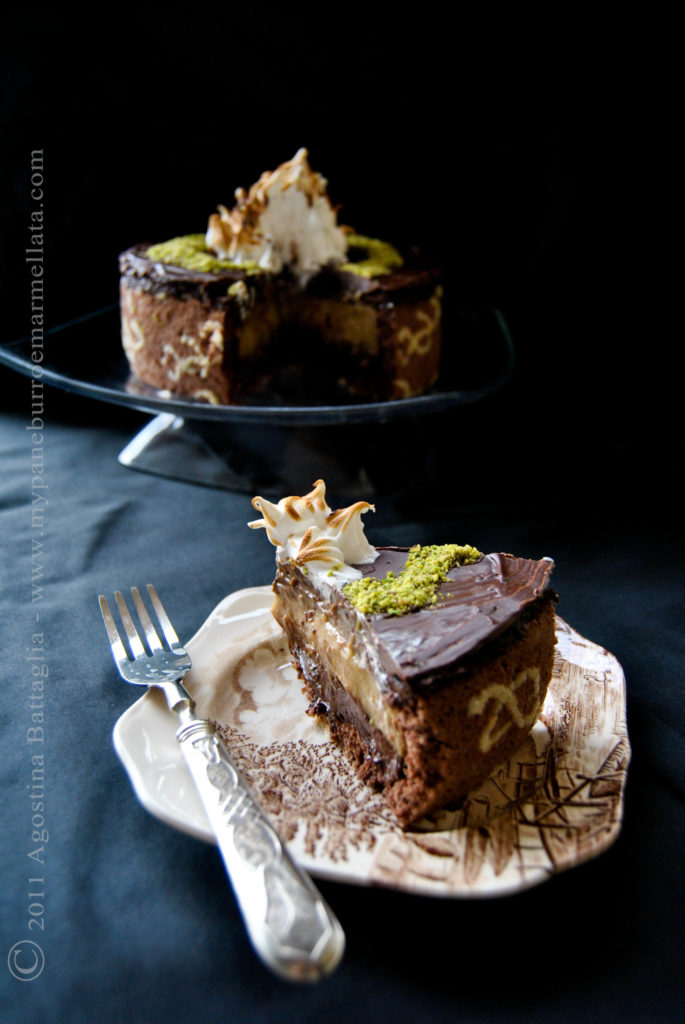
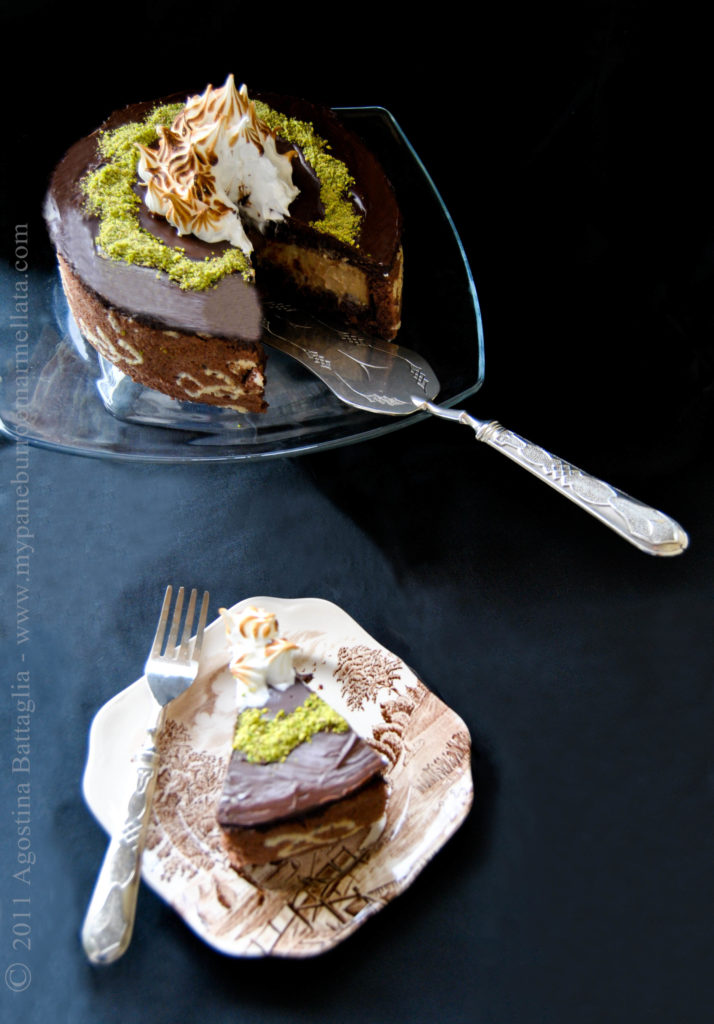
Ho pensato alla cosa più semplice da fare e quindi è composto da: uno strato di mousse al cioccolato, pistacchi di bronte tritati ed uno strato di bavarese alle nocciole. Per la finitura, ho utilizzato una glassa di cioccolato temperato, dei pistacchi di Bronte tritato e dei ciuffetti di meringa italiana fiammeggiati…allora, che dite, vale la pena provare a farlo? 🙂
Biscuit Joconde Imprimè
Pâte à cigarette
serve per disegnare
- 50 gr burro morbido
- 50 gr zucchero a velo
- 50 gr albume d’uovo
- 50 gr farina
- colorante alimentare a piacere (opzionale)
Continuando a montare, unire gli albumi e farli assorbire bene.Per ultimo aggiungere la farina setacciata, mescolare bene.
In base al colore prescelto, unire il colorante alimentare fino ad ottenere il colore voluto.
Io l’ho lasciata del suo colore naturale.- Per la versione al cacao: diminuire la farina (42 gr) ed aggiungere 10 gr di cacao amaro in polvere.
Procedimento per i decori
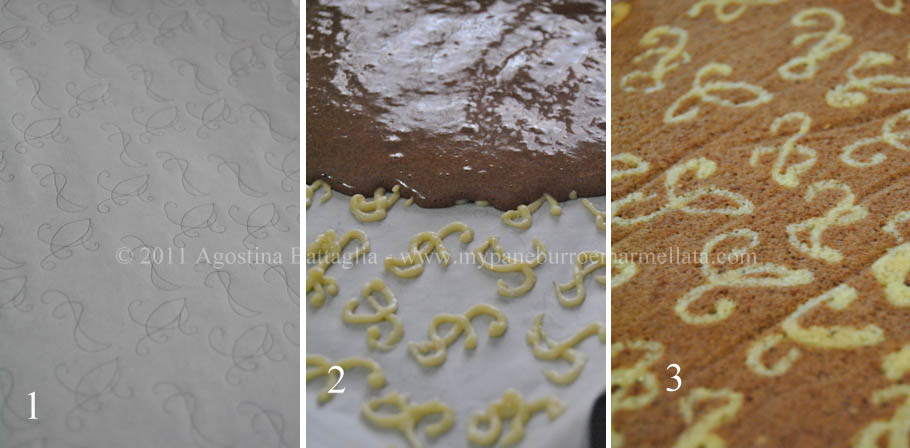
Riempire una tasca da pasticceria con la pate a cigarette e disegnare a proprio piacimento sulla carta.
Se volete riprodurre un disegno ben preciso, disegnata la carta forno sul retro: essendo semitrasparente, riuscirete a visualizzare il disegno dalla parte opposta, e poi ripassatelo con l’impasto appena ottenuto.Ponete la teglia in freezer per 15 minuti, giusto il tempo di preparare il biscuit Joconde.
Biscuit Joconde al cacao
- 30 gr farina
- 10 gr di cacao amaro in polvere
- 30 gr zucchero
- 120 gr mandorle pelate
- 120 gr zucchero a velo
- 3 uova
- 3 albumi
- 20 gr burro chiarificato fuso*
Unire le uova, montando con le fruste per qualche minuto, infine unire il burro chiarificato*.
A parte, montare gli albumi con i 30 gr di zucchero a neve ben ferma ed unire delicatamente al primo composto.* per quanto riguarda il burro, sinceramente mi sono dimenticata di metterlo nell’impasto, ma non ho avuto nessun problema comunque
Prepariamo il biscuit disegnato
Infornare a 200° per 15 minuti a vista.Sfornare e lasciar intiepidire. Prima che diventi freddo, staccarlo dalla carta forno e lasciar raffreddare su una superficie spolverizzata di zucchero a velo.
Entremet Chocolat Noisette
Per il rivestimento esterno
rivestire una tortiera apribile da 18 cm con pellicola da cucina.
Tagliare una striscia di biscuit e rivestire le pareti ed il fondo dello stampo.
Bagnare con una leggera bagna fatta con 75 gr di zucchero, 75 gr di liquore a vostra scelta (io ho usato Amaretto) e 150 gr di acqua. Per prepararla, fate bollire l’acqua con lo zucchero fino a ridurre il liquido della metà. Togliere dal fuoco ed aggiugere il liquore. Far raffreddare ed utilizzare.
Infine procedere alla preparazione interna del dolce, utilizzando il seguente ripieno.
Per preparare questo entremet, ho utilizzato
– questa Mousse al cioccolato fondente
– poi ho spolverizzato con dei pistacchi di Bronte tritati*
– un altro strato di Bavarese alle nocciole
– un ultimo piccolo strato di mousse al cioccolato fondente
* al posto dei pistacchi tritati, sarebbero andate benissimo delle nocciole delle Langhe o anche dei pistacchi, ma tritati grossolanamente.
– Riporre in frigo e preparare la seguente glassa.
Rifinitura
Glassa al cioccolato di S. De Riso
- 50 gr cioccolato fondente
- 40 gr burro chiarificato
- 1 cucchiaio di olio di semi
Prelevare metà impasto e lasciarlo raffreddare in una ciotola a temperatura ambiente mentre l’altra metà va lasciata nel pentolino ad una temperatura di 45°C.
Questa operazione è molto importante per avere l’effetto lucido della glassa.
Riversare il cioccolato raffreddato a temperatura ambiente nell’altro, mescolare, prelevare e versare sopra la torta, livellare e lasciare asciugare bene.
– A questo punto, dopo che la glassa è rassodata, rimuovere il cerchio di contenimento e procedere con la decorazione finale.
Disegnare un’onda sulla glassa e riempirla con i pistacchi finemente tritati.
Fare una dose di meringa italiana e distribuirla a ciuffetti con una tasca da pasticceria. Imbrunire con il cannello.
Riporre il dolce in frigo fino al momento in cui verrà servito.
**************************
English version
The January 2011 Daring Bakers’ challenge was hosted by Astheroshe of the blog accro. She chose to challenge everyone to make a Biscuit Joconde Imprime to wrap around an Entremets dessert.
Do you have you ever thought to create an illusion with a dessert?
The concept is the same as art works… this effect can be achieved with a cake. I’m absolutely sure of this.
I’m not speaking of the moment to sink the spoon to your mouth and concentrating on the sensations that the taste is sending you, but when, standing in front of a dessert, looked at him with awe, fascinated by the perfection of its details … a bit like it may happen with a Plaisir Sucré or a Emoton Ispahan of Pierre Hermé, just to name a few.
Create an illusion with a dessert… I don’t think it’s so difficult: we definitely want a little manual dexterity, but above all the knowledge of the techniques.
With this I would not say that the cake you see today, photographed, can be counted among the wonders of the above:-D absolutely NO!
I speak instead of being able to create a cake from scratch, using only a few technical details and not at all difficult!
Daring Bakers challenge, this month concerns the application dell’imprimer, the press, the Joconde biscuit, named after the arrival of the Mona Lisa (La Gioconda) in France, beautiful topic chosen by Asteroshe
The technique of imprimé Joconde biscuit is very useful for customizing the biscuit base with any decor you have in mind, that’s to say, simple lines and arabesques or pictures with different colors … a lot depends on what you have in the head or thefinal effect that you will get, but I can assure you that even the smallest impressed decoration, will make its effect.
The Joconde embossing and decorating a “designed”, cooked in a light sponge cake, so sweet to give an elegant finish.
The Biscuit Joconde is a light biscuit with almonds and is used for the purpose of the above because it remains wet, retaining its flexibility and thus can be easily adapted to various molds or cake circles.
In short, the challenge was to create a biscuit Joconde imprimé and using it to create an Entremet.
In fact, here it seems everything that isn’t … a bit like Alice in Wonderland …
It seems difficult, but it’s all very simple: the biscuit in the printed version is very easy to create, just follow the steps, while for my dessert, I can tell you it’s really a breeze!
I thought the easiest thing to do and therefore consists of: a layer of chocolate mousse, chopped pistachio and a layer of Hazelnut Bavarian.
To finish, I used a chocolate glaze tempered, chopped pistachios and sprigs of Italian meringue flamed … so you say, is worth trying to do? 🙂
Biscuit Joconde Imprimé
Pâte à cigarette
serves to draw
- 50 g soft butter
- 50 g sugar
- 50 g egg white
- 50 gr flour
- food coloring as desired (optional)
Assemble the butter and sugar until creamy.
Continuing to assemble, combine the egg whites and absorb them well.
Finally add the sifted flour, mix well.
Depending on the desired color, add food coloring until desired color.
I have left its natural color.
– For the chocolate version: Decrease flour (42 grams) and add 10 grams of cocoa powder.
Procedure for the decorations
Coat a baking tray with parchment paper.
Fill a pastry bag with the pate a cigarette and draw at will on paper.
If you want to play a specific pattern, drawn on the parchment paper on the back: being semi-transparent, able to see the design on the other side and then the dough just got ripassatelo.
Place the pan in the freezer for 15 minutes, just enough time to prepare the biscuit Joconde.
Cocoa Biscuit Joconde
- 120 g blanched almonds
- 120 gr icing sugar
- 30 gr flour
- 10 g unsweetened cocoa powder
- 3 eggs
- 3 egg whites
- 30 g sugar
- 20 g melted ghee *
Blend together the almonds and icing sugar in order to get a meal (TPT), which will be mixed with flour.
Combine eggs, riding with whips for a few minutes, then add the clarified butter *.
Separately, beat the egg whites with sugar until stiff and gently combine the first composite.
* As regards butter, honestly I forgot to put in the dough, but I had no problem
Prepare the biscuit designe
Return the pan from the freezer and pour over the biscuit dough (Fig. 2).
Bake at 200 degrees for 15 minutes to view.
Remove from oven and let cool. Before it gets cold, remove it from the parchment paper and let cool on a surface dusted with icing sugar.
Entremet Chocolat Noisette
To prepare this entremet, I used
– then I sprinkled with the chopped pistachios *
– Another layer of hazelnut bavarian
– A final thin layer of dark chocolate mousse
* Instead of chopped pistachios, would go well the Langhe hazelnuts or pistachios, but roughly chopped.
Finish
Chocolate icing from S. De Riso
- 50 g dark chocolate
- 40 g ghee
- 1 tablespoon vegetable oil
Melt the chocolate with the butter and oil.
Remove half of dough in a bowl and let cool to room temperature while the other half is left in the pot at a temperature of 45 ° C.
This is very important to have the shiny glaze.
Pour in the cooled chocolate to room temperature, mix, remove and pour over the cake, level and dry well.
Draw a wave on the icing and filled with finely chopped pistachios.
Prepare the Italian meringue and spread it in tufts with a pastry bag. Dusk with a blowtorch.

