E’ da molti mesi che non riesco più a prendere parte alle interessantissime sfide dei Daring Bakers ed un pò mi dispiace, il tempo è sempre troppo poco per fare tutto, ma il mese scorso Jenni di The Gingered Whisk ha proposto una ricetta che mi ha letteralmente affascinata e che mi è rimasta in testa fino a quando non ho potuto realmente riprodurla…
C’è sempre qualcosa da imparare in cucina: leggere degli esperimenti ed esperienze degli altri blogger sia italiani che provenienti da tutto il Mondo, non può che portare nuove conoscenze, in generale, e serve anche a migliorare il proprio bagaglio culturale. La cucina di ogni Paese è cultura, rappresenta il suo popolo e questo chiaramente vale sia per la cucina di ognuno di noi, quella italiana nello specifico, che per la cucina internazionale.
Qualche esempio, ve lo posso mostrare con alcune ricette che ho pubblicato in precedenza: le Sfingi di San Giuseppe, gli agnolotti di Timau – Cjalsòns Krofin di Timau, la Pancetta arrotolata di Nero di Calabria arrosto oppure la Tortiera di Alici per quanto riguarda l’Italia, mentre se vogliamo dare uno sguardo all’estero, alcuni piatti tra i più “istruttivi”, sono stati sicuramente il Burghul al Pesto di Nocciole e Pollo – بُرْغُل بِالبُنْدُقِ و الدِجَاجِ
i Dolmades (Dolma, Wara Einab, دوُلما ) – Involtini di foglie di vite, il Croquembouche o anche il Tian all’arancia e fiori di rosmarino – Orange and Rosemary Tian e tanti altri piatti che potete trovare nell’indice…questo insomma per dire che per me, la cucina è soprattutto una continua scoperta e conoscenze sempre nuove 

Oggi usciamo dall’Italia ed iniziamo a viaggiare verso Est 

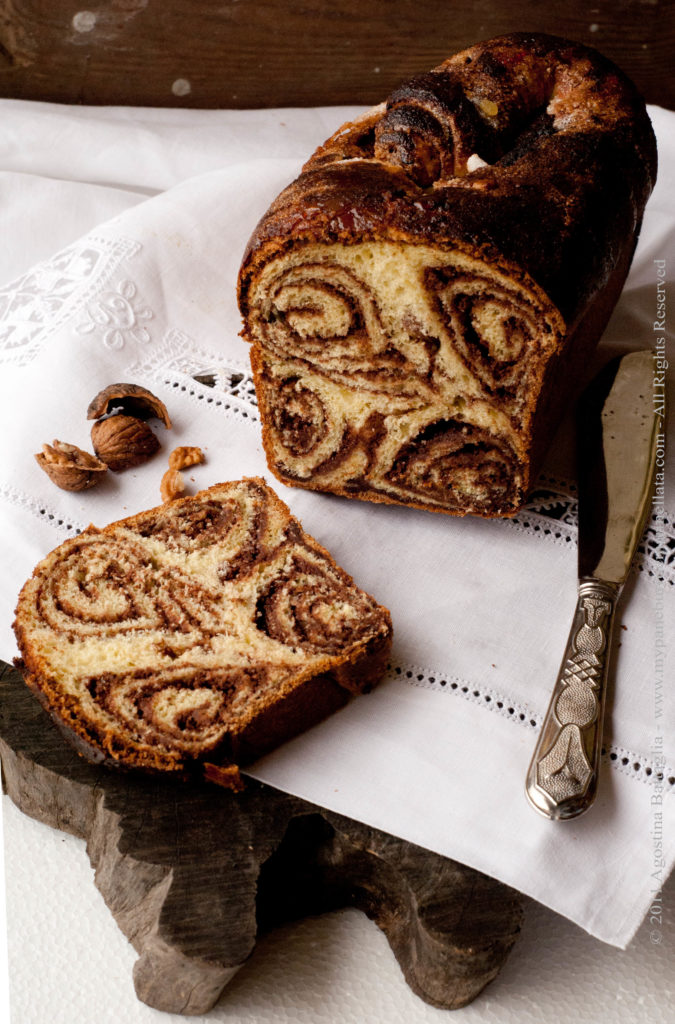
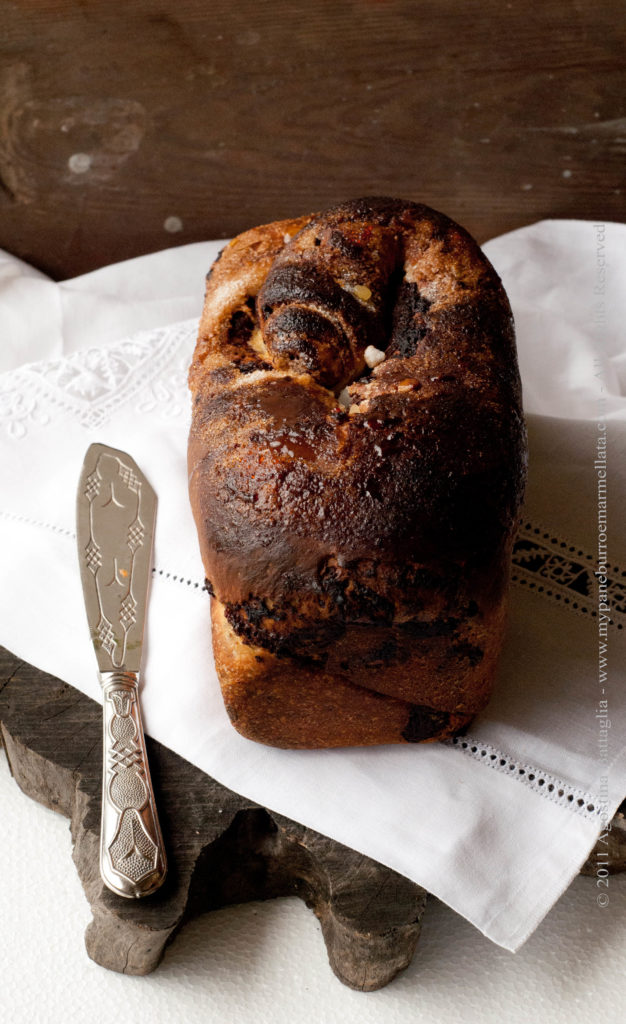
La Povitica (si pronuncia po-va-teet-za) è un pane dolce, una sorta di pan brioche, mangiato soprattutto durante le festività o anche compleanni e matrimoni. E’ un dolce tipico di Slovenia, Croazia, Polonia, Slovacchia ed Ungheria ed è anche conosciuto come Orehnjača in Croazia, Potica in Slovenia, Orechovnik in Slovacchia and Štrudla in Serbia.
La sua è una ricetta di famiglia, come la tradizione di ogni Paese vuole, quindi tramandata di generazione in gerazione, soprattutto per quello che riguarda la sua tecnica.
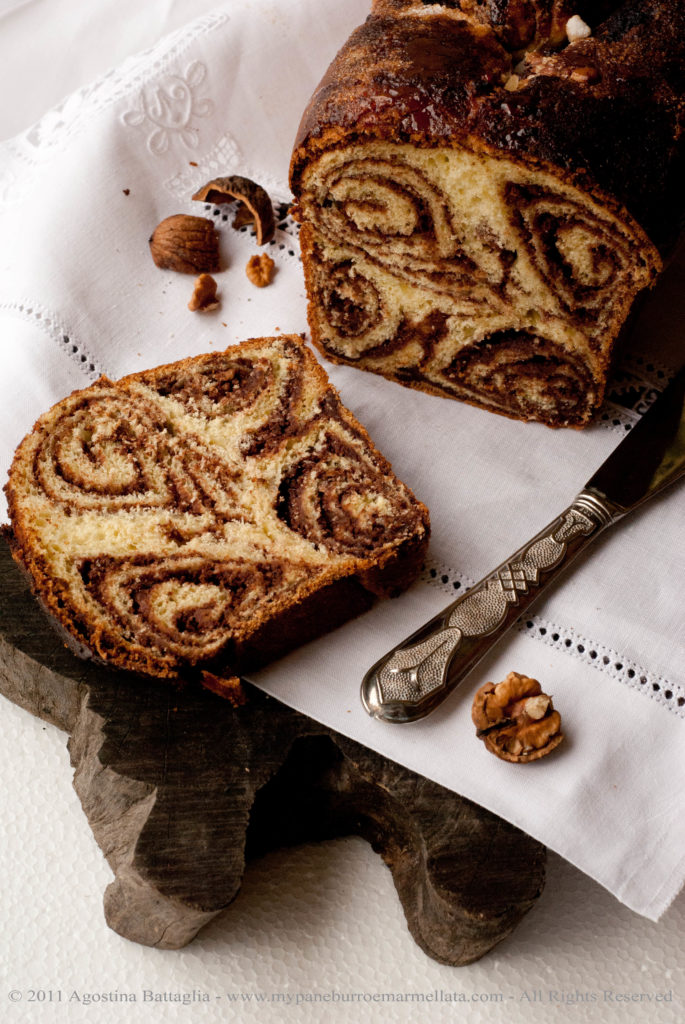
All’apparenza potrebbe sembrare una semplice brioche, ma non è proprio così: la sua particolarità è data dal suo interno, formato da tanti sottilissimi cerchi di pasta ripieni tradizionalmente di un composto di noci e cioccolato, ma ci sono anche ripieni alternativi, come semi di papavero, marmellata, nocciole, mele, zucca o anche formaggio cremoso.
La tecnica per ottenere questo tipo di brioche è molto particolare: la pasta va stesa sottilissima, tanto da riuscire a vedere cosa c’è scritto su un foglio posto sotto all’impasto stesso (questo giusto per farvi capire quanto deve essere tirato sottile, non lo dovete fare sul serio :-D) ed anche questa è una tecnica tramandata anticamente.
Posso assicurarvi che non è difficile, basta solo un pò di pazienza ed il gioco è fatto!
E’ un ottimo dolce sia per la colazione che da servire come semplice dessert a fine pasto, ma si dice anche che “una Povitica portata in regalo da una famiglia ad un’altra sia un simbolo di rispetto e costituisca il dono perfetto”.
E con questa meravigliosa brioche, bella sia da guardare che da mangiare (ve lo assicuro :-D), che da regalare, inauguro anche il periodo natalizio e spero di riuscire a darvi altre indicazioni per dei regalini goduriosi 

Vi allego il procedimento con il lievito madre che con il lievito istantaneo
Povitica, pane dolce alle noci
Ingredienti
Per l’impasto
- 120 ml di latte
- 43 gr di zucchero
- 4 gr di sale
- 1 uovo
- 30 gr di burro ammorbidito
- 280 gr di farina
- 100 gr di lievito madre oppure 1 cucchiaio e 1/2 di lievito istantaneo*
- *se usate quest’ultimo, aggiungete anche 1/2 cucchiaio di zucchero, 1/4 di cucchiaino da tè di farina e 2 cucchiai di acqua tiepida
Per il ripieno
- 280 gr di noci
- 80 ml di latte
- 60 gr di burro
- 30 gr di uovo leggermente sbattuto
- 30 gr di cacao Van Houten
- 1 bacca di vaniglia
- 120 gr di zucchero
Per il topping
- un albume leggermente sbattuto
- zucchero semolato
Procedimento
con il lievito madre
Riscaldare il latte e sciogliervi il lievito madre. Unire lo zucchero, l’uovo leggermente sbattuto, il burro, la farina ed impastare. Appena l’impasto ha assunto consistenza, unire anche il sale e continuare ad impastare fino ad ottenere un impasto elastico e morbido.
Riporre in una terrina leggermente oliata e lasciare lievitare fino a raddoppio, circa 6 ore.
– Eventualmente, si può anche impastare la sera precedente e riporre in frigo fino al mattino successivo. In questo caso però si deve avere l’accortezza di lasciare l’impasto a temperatura ambiente per un’oretta prima di poterlo utilizzare -.
Prepariamo il ripieno
Ridurre in polvere le noci con lo zucchero ed il cacao.
Portare a bollore latte e burro, lasciare leggermente raffreddare, ed aggiungerli al composto di noci insieme all’uovo. Aggiungere la vaniglia e mescolare. Lasciar raffreddare.
Questo composto deve avere la consistenza di una cremina, quindi se risulta asciutto aggiungere un pochino di latte.
Assemblaggio
Infarinare leggermente il piano di lavoro.
Stendere inizialmente l’impasto con il mattarello fino a che non si raggiunge una dimensione di 25 cm circa.
Spennellare la superficie con il burro fuso e continuare a tirare la pasta con le mani, dolcemente.
E’ abbastanza elastica e non si dovrebbe strappare, insomma si dovrà arrivare ad ottenere una sottilissima sfoglia, cercando di mantenere il più possibile una forma rettangolare.
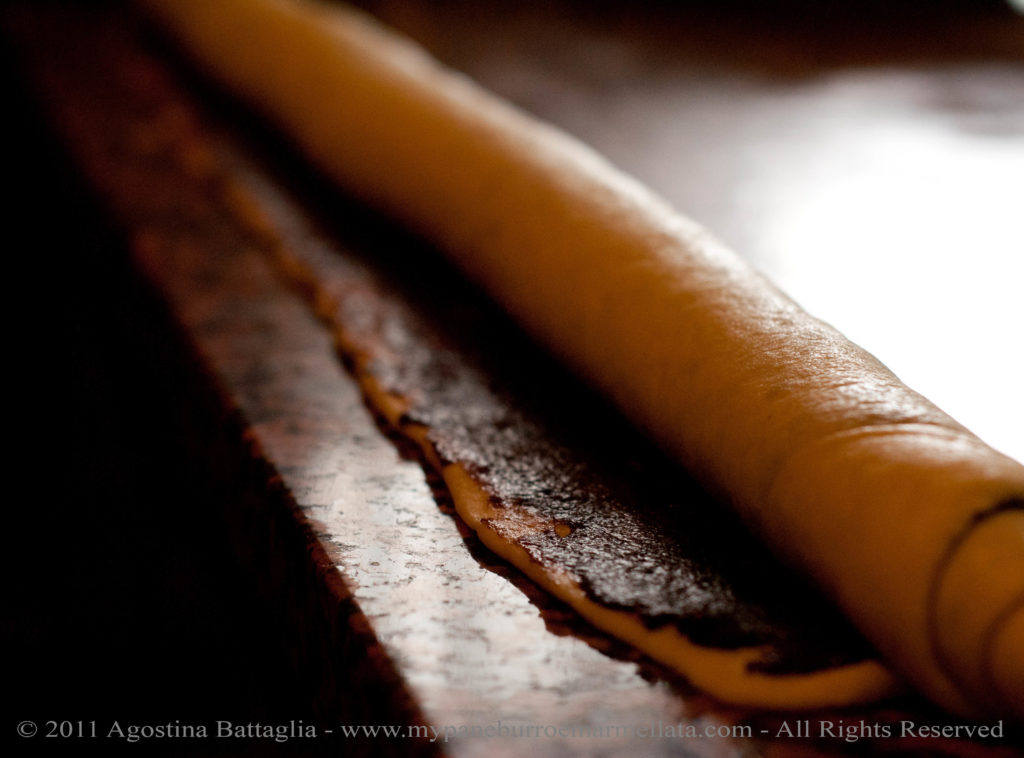
Coprire tutta la usa superficie con il ripieno preparato in precedenza, ormai raffreddato, ed arrotolare il tutto, fino ad ottenere una lunghissimo rotolino.
Imburrare ed infarinare uno stampo da plumcake e posizionare tutto il rotolino in esso, prendendo ad esempio la forma di una “U”.
Spennellare la superficie della brioche con l’albume leggermente sbattuto e spolverizzare di zucchero semolato.
Lasciare lievitare per ulteriori 2 ore.
Preriscaldare il forno a 180° ed infornare il dolce per 15 minuti.
Abbassare la temperatura a 150° e continuare la cottura per ulteriori 45 minuti circa.
Sfornare e spennellare con il burro buso (io non l’ho fatto).
Lasciare raffreddare nello stampo.
Il modo migliore per porzionarlo è tagliarlo con un coltello seghettato, girandolo a testa in giù.
Con il lievito istantaneo
Bisogna attivare il lievito, quindi mescolare insieme: zucchero, farina, lievito ed acqua calda in una ciotolina e lasciar riposare per 5 minuti, fino a che non inizia a schiumeggiare.
Mettere il latte tiepido, zucchero, sale ed uovo in una ciotola e mescolare. Aggiungere il lievitino, il burro ammorbidito ed infine la farina. Impastare fino ad ottenere un impasto elastico e lasciare lievitare per un’oretta o fino a che non raddoppierà di volume.
Seguire tutta la parte dell’assemblaggio descritta sopra, fino a dare una forma all’impasto nello stampo da plumcake.
Lasciare lievitare per ulteriori 15 minuti, ricoperto con un foglio di pellicola trasparente.
Infornare e seguire il resto del procedimento come sopra.
Note
Ci sono diverse opzioni per conservare questo pane:
• si manterrà fresco per 1 settimana a temperatura ambiente.
• si manterrà fresco per 2 settimane se conservato in frigo.
• può essere congelato per un massimo di tre mesi, avvolto da uno strato di carta oleata seguita da uno strato di carta stagnola. Si consiglia di non congelarlo con ripieno di crema di formaggio in quanto non si scongelerà molto bene ed andrà a briciolarsi.Con questa ricetta, partecipo al contest di Carolina, in collaborazione con Mama Shabby
—————————–
Povitica, or Croatian walnut bread, is a nostalgic favorite of many Eastern Europeans and their descendants. Also known as Orehnjača (walnut bread) and Makovnjača (poppy seed bread) in Croatia, Povitica is a favorite of many other neighboring cultures. Known also as Potica in Slovenia, Orechovnik in Slovakia and Štrudla in Serbian, recipes vary from region to region and family to family.
Povitica is rolled yeast bread, somewhat akin to strudel. It is typically served at special occasions, such as the holidays, birthdays and weddings. The versatility of this bread makes it perfect for morning coffee, or as a simple dessert. By some, the process of making povitica is revered as a dying art, made by long gone grandmas and aunts in the “old country.” In the United States, many immigrants have brought their family recipes for povitica and have passed them down, preserving the tradition. It is said that a gift of povitica from one family to another is a symbol of respect, making it a perfect hostess gift.
The sweetened dough is rolled out very thin and flat, and then is slathered with filling. While walnut is the most traditional of the fillings used to make povitica, other choices of fillings include hazelnuts, chocolate, poppyseed, strawberry jam, apples, cherry, pumpkin and cream cheese. After the filling is spread over the dough, it is rolled tightly, into a simple roll and baked, or placed into a loaf pan for a more uniform loaf. [source here]
Povitica, Croatian Walnut Chocolate Bread
Ingredients
To activate the Yeast:
½ tsp sugar
¼ tsp all purpose flour
2 tbsp warm water
1½ tsp dry yeast
Dough:
½ cup warm milk
3 tbsp sugar
3/4 tsp salt
1 egg
25 gr unsalted butter, melted
2 cups all-purpose flour
Walnut Filling:
1¾ cups Ground English Walnuts
¼ cup Whole Milk
¼ cup Unsalted Butter
2 tbsp Whole Eggs, lightly beaten
1 vanilla bean
½ Cup Sugar
1/4 cup Dutch-processed cocoa
Topping:
1 egg white, lightly beaten
½ tbsp Granulated Sugar
Directions:
To Activate Yeast:
1. In a small bowl, stir sugar, flour, and the yeast into the water and cover with plastic wrap.
2. Allow to stand for 5 minutes
To Make the Dough:
3. In a medium saucepan, heat the milk up to just below boiling (about 180°F/82°C), stirring constantly so that a film does not form on the top of the milk. You want it hot enough to scald you, but not boiling. Allow to cool slightly, until it is about 110°F/43°C.
4. In a large bowl, mix the scalded milk, sugar, and the salt until combined.
5. Add the beaten egg, yeast mixture, melted butter, and the flour.
6. Blend thoroughly and slowly add remaining flour, mixing well until the dough starts to clean the bowl.
7. Turn dough out onto floured surface and knead, gradually adding flour a little at a time, until smooth and does not stick.
8. Place dough in an oiled bowls, cover loosely with a layer of plastic wrap and then a kitchen towel and let rise an hour and a half in a warm place, until doubled in size.
To Make the Filling
9. In a large bowl mix together the ground walnuts, sugar and cocoa.
10. Heat the milk and butter to boiling.
11. Pour the liquid over the nut/sugar mixture.
12. Add the egg and vanilla and mix thoroughly.
13. Allow to stand at room temperature until ready to be spread on the dough.
14. If the mixture thickens, add a small amount of warm milk.
To Roll and Assemble the Dough
15. Spread a clean sheet or cloth over your entire table so that it is covered (it’s not necessary! The dough can be rolled up by hand as I do).
16. Sprinkle with a couple of tablespoons to a handful of flour (use flour sparingly)
17. Place the dough on the sheet and roll the dough out with a rolling pin, starting in the middle and working your way out, until it measures roughly 10-12 inches in diameter.
18. Spoon the melted butter on top.
19. Using the tops of your hands, stretch dough out from the center until the dough is thin and uniformly opaque. You can also use your rolling pin, if you prefer.
20. As you work, continually pick up the dough from the table, not only to help in stretching it out, but also to make sure that it isn’t sticking.
21. When you think it the dough is thin enough, try to get it a little thinner. It should be so thin that you can see the color and perhaps the pattern of the sheet underneath.
22. Spoon filling (see below for recipe) evenly over dough until covered.
23. Lift the edge of the cloth and gently roll the dough like a jelly roll.
24. Once the dough is rolled up into a rope, gently lift it up and place it into a greased loaf pan in the shape of a “U”, with the ends meeting in the middle. You want to coil the dough around itself, as this will give the dough its characteristic look when sliced.
25. Brush the top of the loaf with the white egg, beaten, and the sugar.
26. Cover pan lightly will plastic wrap and allow to rest for approximately 15 minutes.
27. Preheat oven to moderate 350°F.
28. Remove plastic wrap from dough and place into the preheated oven and bake for approximately 15 minutes.
29. Turn down the oven temperature to slow 300°F and bake for an additional 45 minutes, or until done.
30. Check the bread at 30 minutes to ensure that the bread is not getting too brown. You may cover the loaves with a sheet of aluminum foil if you need to.
31. Remove from the oven and allow to cool on a wire rack for 20-30 minutes, still in the bread pan.Remember, the bread weighs about 2.5 and it needs to be able to hold its own weight, which is difficult when still warm and fresh out of the oven. Allowing it to cool in the pan helps the loaf to hold its shape.
32. It is recommended that the best way to cut Povitica loaf into slices is by turning the loaf upside down and slicing with a serrated knife.
Storage:
There are several options for storing (and eating) your loaf of Povitica:
There are several options for storing (and eating) your loaf of Povitica:
• The Povitica will keep fresh for 1 week at room temperature.
• The Povitica will keep fresh for 2 weeks if refrigerated.
• The Povitica can be frozen for up to three months when wrapped a layer of wax paper followed by a layer of aluminum foil. It is recommended to not freeze Povitica with cream cheese fillings as it doesn’t hold up to being thawed really well – it crumbles.


